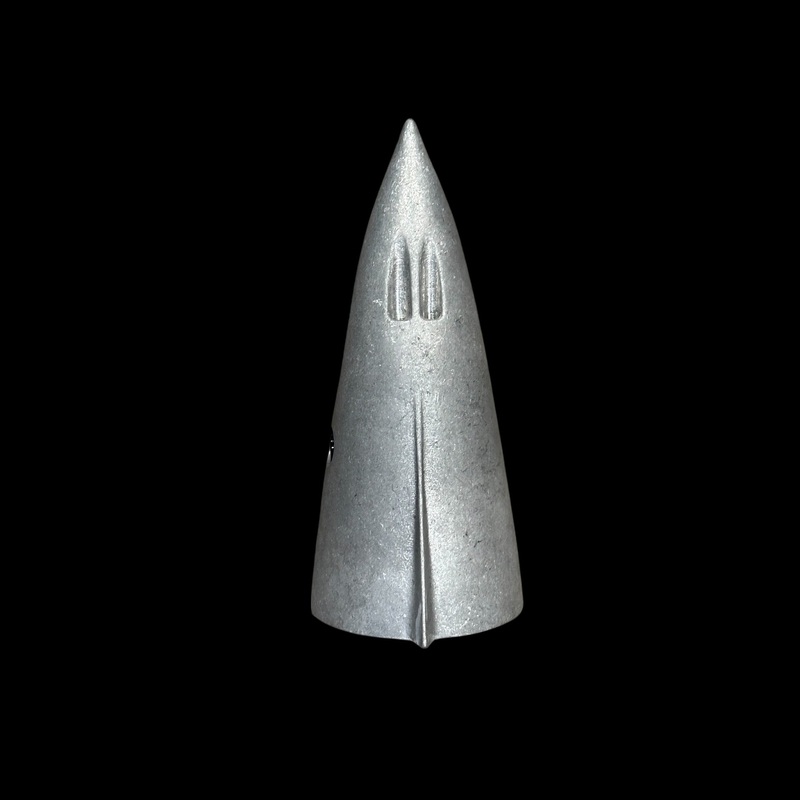
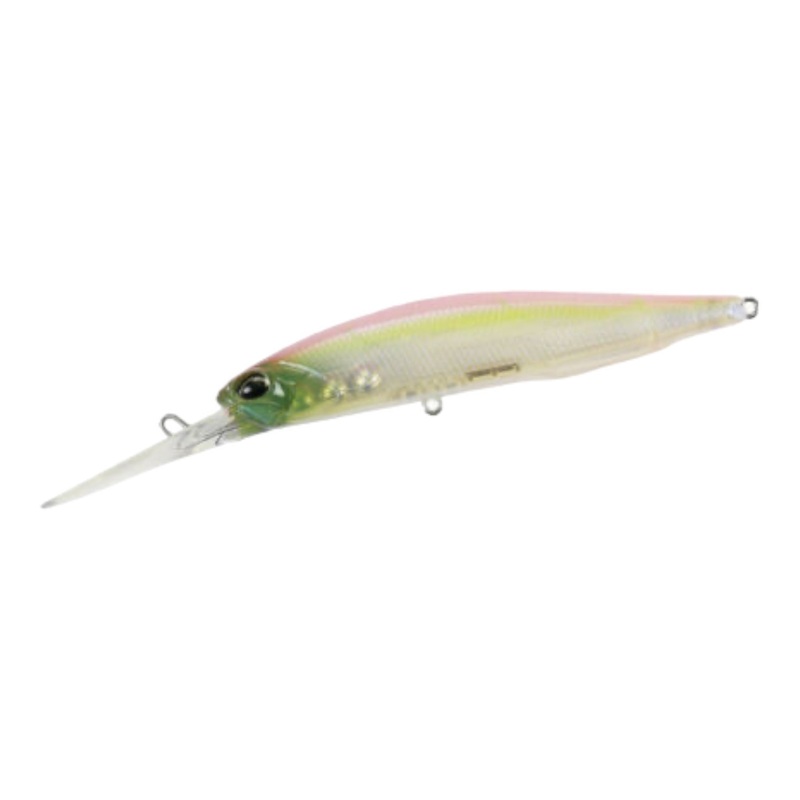
Nizpro Yamaha SHO Performance Nosecone
Nizpro Yamaha SHO Performance Nosecones are designed to go over the nose of your factory lower units nose without the need to weld it in place.The performance nosecone is designed to help you reach higher speeds, gives you easier steering, lower water pick
Nizpro Yamaha SHO Performance Nosecones are designed to go over the nose of your factory lower units nose without the need to weld it in place.
The performance nosecone is designed to help you reach higher speeds, gives you easier steering, lower water pick-up is located on the very bottom to give you better pressure when running low water.
Oil drain re-location is not necessary with the access plug and installation of the supplied oil drain guide.
Nizpro Nose cone installation instructions.
Congratulations on your purchase of the Nizpro Marine nose cone, please follow the instructions below carefully to achieve the best possible results.
Contained in your nose cone kit is the following:
- Nizpro Cast alloy high-efficiency nose cone extension
- Black anodized 16mm x 1.5 mm oil drain plug cap
- Plastic oil drain guide
- 2 x JB Weld Original Cold Weld Formula Steel Reinforced Epoxy Twin Tube, 56g
- 2 x GPI White Plastic Body Filler Applicators
- 24-grit sandpaper
- 240-grit sandpaper?
- CAD-developed skeg cutting template
- Installation instructions
- Product Information booklet
To complete the installation you will need to source the following locally, as international shipping of these items becomes costly.
- Yamaha etch primer
- Yamaha colour aerosol paint
- Yamaha clear-coat paint
- Automotive body filler
- Wax and grease remover
Tools required:
- Hacksaw
- New 24tpi (or higher) blade
- Metal file
- Soft (plastic or rubber) hammer
- Fine-tip permanent marker
1) Using the Skeg cutting template place it at the very front of the skeg/fin and slide it backwards until it sits flat on the round gearcase but is as far back as you can go before it starts to lift away from the gearcase. This now shows you the position where you need to cut the skeg/fin.
2) Mark the skeg/fin using a fine-tip permanent marker, remove the template, and make a vertical cut using a Hacksaw with a 24tpi (or higher) saw blade.
3) Using the same hacksaw and blade now cut the skeg/fin parallel from the front of the skeg/fin back towards the vertical cut you just made until the triangular piece of skeg/fin is removed.
4) Using a metal file, file back the remaining skeg/fin until you have a uniform, round, lower section where you just removed the skeg/fin. This needs to be round and smooth so that the nose cone will slide all the way back and meet up with the skeg/fin that you just cut.
5) Slide the nose cone on and lightly tap with a soft hammer using a piece of wood between the nose cone tip and the hammer until the nose cones fin joins up to the cut section of the original skeg/fin.
6) Using your fine-tip permanent marker, mark all the way around where the nose cone joins the lower unit.
7) Remove the nose cone and now mark 25mm (1 inch) both sides of the line you created in step 6. This 50mm (2 inch) strip is the area that needs to be sanded to achieve a correct bonding surface.
8) Sand the 50mm (2 inch) section until there is no remaining paint on the lower unit. Use the 24-Grit sandpaper provided in all directions so that the scratched surface has sanding marks over the top of itself in all directions.
9) Take the nose cone and look inside, you will see a mark in the casting approximately 25mm (1 inch) in from the outer edge. This is the bonding surface.
10) Take the 24-Grit sandpaper and, just like on the lower unit, sand this 25mm (1inch) area until all the original casting finish is removed and the sandpaper marks are in all directions.
11) Test fit the nose cone again, as per the method in step 5, and remark the join again with your permanent marker. This is so you will know where the epoxy needs to be placed on the lower unit.
12) Take the Plastic oil drain guide and place a small dob of silicon on the underside where the locating peg is and place it in position. This is simply to hold it in position while you are installing the nose cone.
13) Take a clean rag and use acetone (nail polish remover) to clean/wipe the lower unit and inside of the nose cone that has been sanded.Do not touch these areas by hand again.
14) There are two tube sets of JB Weld Original Cold Weld Formula Steel Reinforced Epoxy supplied. You will use roughly One twin pack for the inside of the nose cone and the other twin pack for the outside of the lower unit. The epoxy is applied this way so both the inner surface of the nose cone and the outer surface of the lower unit have a fully coated surface and when the cone is placed onto the lower unit the epoxy now only needs to bond to itself, and there are no dry areas.
15) MAKE SURE THE Plastic oil drain guide IS IN POITSION. You do not get another chance at putting this in.
16) Mix up the JB Weld Original Cold Weld Formula Steel Reinforced Epoxy fromboth twin packs at once. We recommend doing this on some clean carboard, with each twin pack mixed on a separate piece. This will help you get the correct amount on both inner and outer surfaces.
17) Using a supplied spatula, apply an even amount of epoxy on the inner surface of the nose. Apply it up to the edge of the sand marks (25mm/1 inch from outer surface). Apply it to the outer surface of the lower unit also, up to 25mm (1 inch) forward of the mark you made in step 11. Make sure you apply the epoxy as evenly as possible all the way around.
18) Push nose cone onto the lower unit making sure thePlastic oil drain guide is still in its correct position as the nose cone goes on.
19) Tap the nose cone on again using the piece of wood and soft hammer until the nose cone fin and lower unit skeg/fin touch each other. The nose cone should hold itself on and should not require any assistance staying on, however, we recommend having the lower unit secured on a bench or in a vice, with the cone pointing up (prop shaft facing down).
20) At this point you will have a large amount of excess epoxy squeezed out of the joint line. Taking your provided spatulas blend the epoxy to smooth out the joining seam. You can do this back to the painted edge on the lower unit, approximately 25mm (1 inch) from the join line. You will not achieve a perfect blend, but you will get it very close.
21) Once you have finished the blending work from step 20, carefully turn the complete lower unit over so that the nose cone is pointing down and touching your bench (or the ground) and the prop shaft is facing upwards. Support the lower unit so it does not fall over.
Note: The reason you want the nose cone facing downwards while the epoxy is curing is because in the first hour or so while its curing it will sag away from the joint line if the nose is facing upwards. When facing down the epoxy will sage into the joint giving it a better seal.
22) Wait TWENTY-FOUR HOURS for the epoxy to cure.
23) The epoxy is now ready to be sanded, to smooth the joint line and restore the lower gearcase shape.
24) Once sanded you will need to add automotive putty into any remaining low spots on the joint and blend lines. If you have done a great job when smoothing the epoxy, you will achieve this with one application of automotive filler, but if you have not worked with body filler before this may take you one or two extra applications.
Remember, its the preparation time that gives the best results, so simply get it right at this stage.
25) The automotive filler should be sanded back in the final stages with 240-grit sandpaper ready for undercoating.
26) Wipe down the entire area to be painted with a clean rag and some wax and grease remover.
27) Use Yamaha Etch Primer 300CC and apply as directed.
28) While at your local Yamaha dealer get the appropriate colour and also the clear-coat spray on paint to suit your engine. Ask your Yamaha parts representative for the correct colour for your engine year and model.
29) Apply as directed.
Reviews
There are no reviews yet.